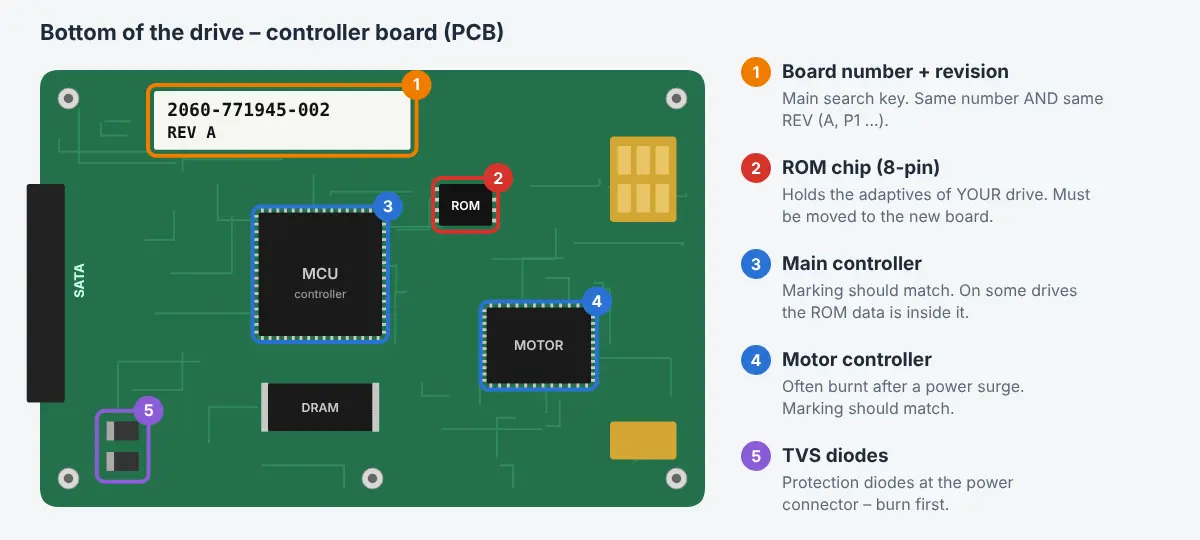
The PCB (printed circuit board, controller board) is the green board on the bottom of the drive. It is the part most often damaged by power surges, wrong power supplies or short circuits – and the only repair that is realistic outside a lab.
Signs of a PCB failure
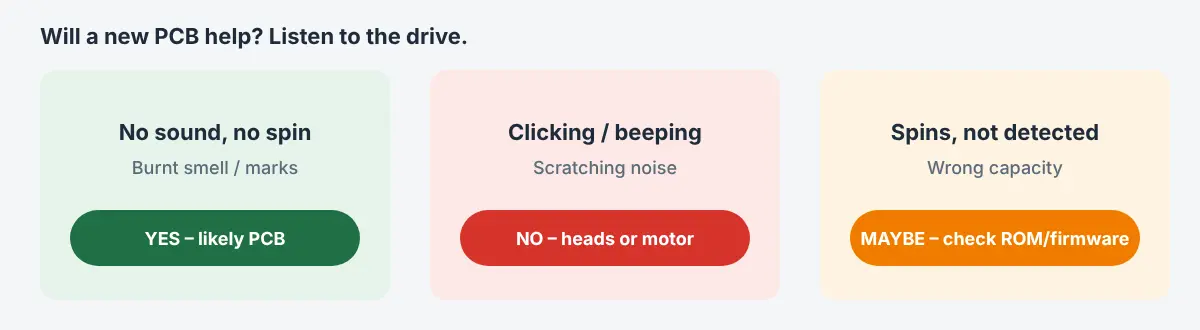
- The drive does not spin up at all, no sound.
- Burnt smell, visible burn marks on a chip or diode.
- The failure happened right after connecting a different power supply or cable.
If the drive clicks, beeps or makes scratching noises, the problem is usually inside (heads, motor) – a new PCB will not help then.
How to find the right board
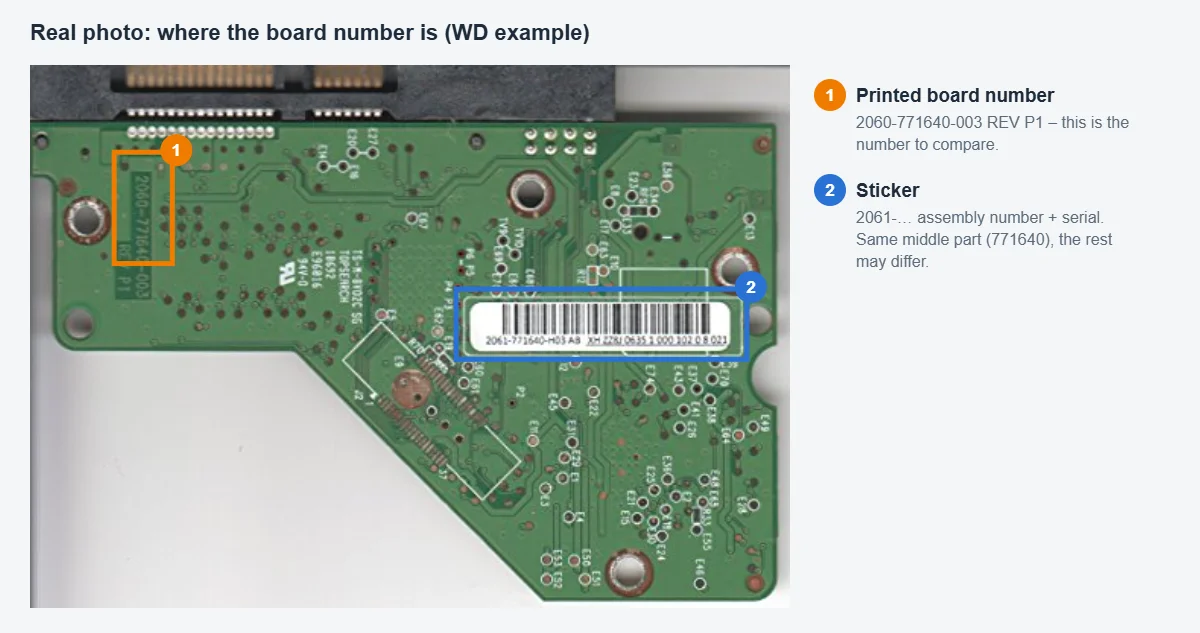
- Board number – on a white sticker or printed on the board. Examples: Western Digital
2060-771945-002 REV A, Seagate100774000 REV A, SamsungBF41-00354B. - Revision – the letters/numbers after the board number (REV A, P1 …). They should match too.
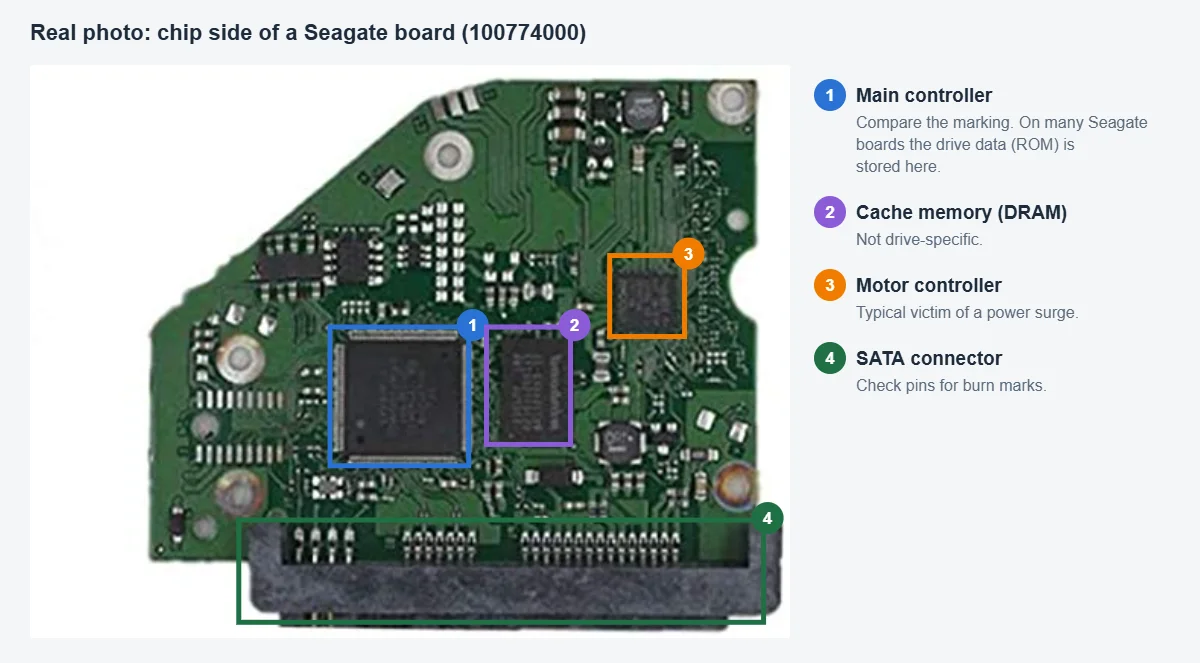
- Chips – compare the main controller and the motor controller markings. The same board number can exist with different chips.
- Drive model – the board should come from the same model, ideally a close firmware/production period.
Why the ROM must be transferred
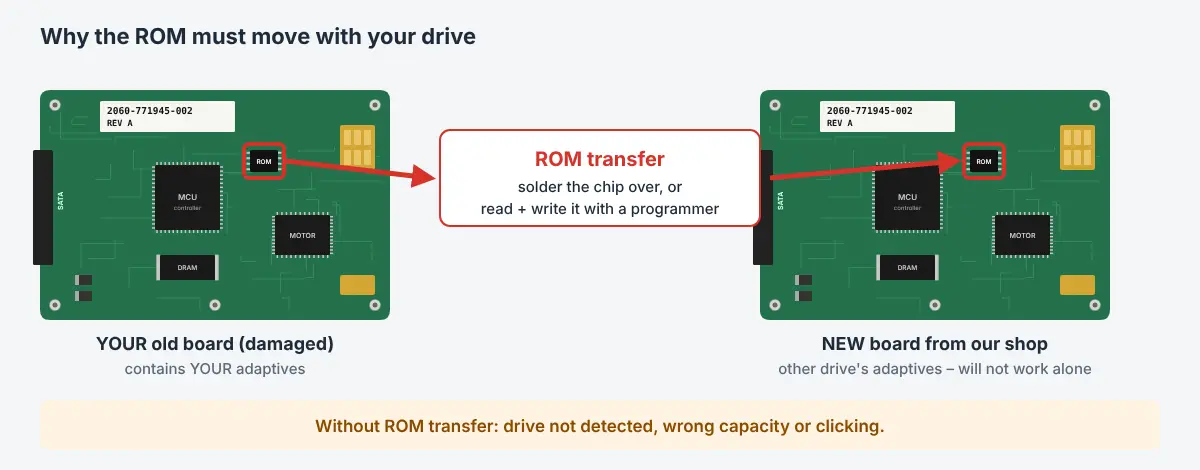
Modern drives store individual calibration data (“adaptives”) on the board – in a small 8-pin flash chip or inside the main controller. A board from another drive has other calibration data. With it, your drive will usually not be recognised, report a wrong capacity or start clicking. Therefore the ROM content of your original board must be moved to the new board: either by soldering the chip over or by reading and writing the content with a programmer.
Our ROM transfer service
- Order the PCB in our shop and select “Add ROM chip transfer”.
- Send us your original board only (without the drive), with the order number, in an antistatic bag.
- We transfer the ROM and send you the board ready to install.
If you only want to replace the board yourself: handle it with ESD protection, use the correct Torx screwdriver and do not touch the contacts to the head stack.
A new board is not always enough
If a short circuit has also damaged the motor or the heads, the drive will still not work. In this case – and whenever the data is important – a data recovery lab should look at it before more attempts are made.

 English
 Deutsch
 Français
 Italiano
 Español